Saturday, May 29, 2010

A Few More .jpgs

Today, I'm featuring a few more .jpg files from recent projects I've done.


A crock pot is great to use on recipe pages (especially those that use a crock pot!). Here is the cut I made ....


This was made from this .jpg file .....


This little cricut head is super cute and great to use as an iconic image for those that love our bugs.


He can be used on a card for a Cricut friends, a scrapbook page about our crafting, or as a sticker for a friend that loves his/her Cricut. :)


Here is the .jpg file for this adorable critter.


As before, right click on the picture, click save as, and save the file somewhere that you can find it. Go into SCAL, click 'import jpg' and find the file you just saved. Preview it before you import it. Then, click ok. :)


Enjoy the files. On Monday, I will have another card for you, Tuesday will be our Tooty Fruity Tuesday, and a challenge day is coming on Thursday. Stay tuned for the fun!


Happy Memorial Day!! Take time to remember those that died for our freedom here in the USA. Take a moment to thank a service member, a veteran, or the memory of someone who served. Thank you, Jared (my oldest son, presently serving as a US Marine), Daddy, Kevin (my brother), Sam (my father-in-law), and so many others that have given time and energy and have risked their lives to protect the freedom that I hold so dear.


Have a wonderful Saturday and a great, big, beautiful tomorrow.


~*Shell*~

Tuesday, May 25, 2010

Something a Little....

Different. :) I think that I'm going to start doing things a little differently on here. On Tuesdays, I believe that I'm going to TRY to have Tooty Fruity Tuesdays - a Toot-orial each Tuesday. The tutorials, for the foreseeable future, will be focused on SCAL and it's functions. I will start with basic ones and work on to a little more advanced things as I go. On this page, I also plan to begin putting the .jpg file of some of the cuts that I've made. The blog will not host 'files', but it will host pictures. If I put the .jpg on here, you can copy it and import it - easily - into SCAL for your own use.

Today, I'm featuring a peanut picture and an olive picture. I recently used both on some 6x6 recipe pages I was making for a swap.

The peanut as seen once cut by the Cricut ...


And the original .jpg file. Once it was imported into SCAL, I used "Blackout" to get rid of all of the tiny holes. I needed a LOT of these little guys and didn't want to wait for the Bug to cut all of the tiny holes. I didn't really need those, anyway, as I used the Cuttlebug to emboss each peanut to add the texture.


The olive as seen when cut by the Cricut .....


The original .jpg files.

The olive base.


The olive layers (I elected not to use the highlighting stripe on my cut.).


You should be able to click on each picture, right click on the big picture when it comes up, and save it on your computer. Save it in an easy place to remember (but I don't suggest your desktop!!) so that you can find it when you go to import it into SCAL. :)


I will go over the method of importing later in a Tooty Fruity Tuesday Tutorial. Next Tuesday, look for an overview of a lot of the basic features of SCAL.


Hopefully, this will be useful to some of you - and even a reminder of some of the cool things that SCAL does for those of you who have used SCAL for a while.

Let me know what you think and what you'd like a Tooty Fruity Tuesday to focus on!


Have an awesome Tuesday and a great, big, beautiful tomorrow!!


~*Shell*~

Friday, May 21, 2010

Castle Banner

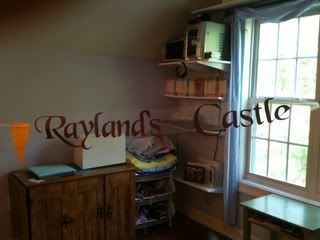
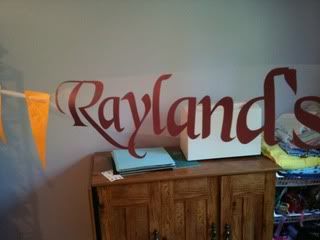
A friend was having a birthday party for her daughter. It was, of course, a princess party. :) :) I was asked to make a banner for the 'castle' entrance. Cutting the letters with the Cricut was an obvious choice, right?


The letters were cut at about 6 inches each and the font used was Black Chancery. The 12x24 paper by Cricut/Provo Craft was used for this project.

Once the letters were cut, I had a quandary : How do I hang these suckers up?!

The pennants were easy. Each one had 2 holes and string, ribbon, or whatever could be strung through those to hang them. The letters, however, had no such holes.....


As I was looking for ribbon (that I wanted to waste) to put behind each letter, I found my stash of tulle. Tulle .... Hmmmm ..... YES!!!

Each letter was adhered to the tulle and the pennants were hung as mentioned before.

This gave the banner a bit of a floating effect.

Photobucket


It's difficult to see with the busy background, though.

Photobucket


I think that I would do the letters in a lighter color should I do this again. The purple (which I thought looked ... majestic) doesn't show up as well as I would have hoped. The pennants were embossed with the Disney Princesses using the Cuttlebug.


The banner over Rayland Castle with 2 beautiful princesses under it.


Hope you have a great Friday and a great, big, beautiful tomorrow!! :)


~*Shell*~

Monday, May 17, 2010

May Challenge #4

One more time. :)

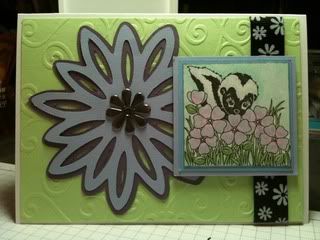
On this card, the image and the embossed background came in the challenge kit.

Photobucket

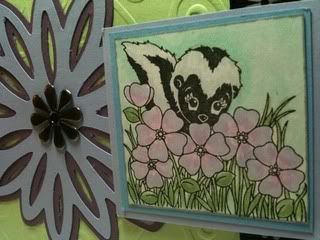
The ribbon and flower brad were in my stash. The image was colored using Copics, and it was put up on pop dots to add some dimension to the card.

Photobucket

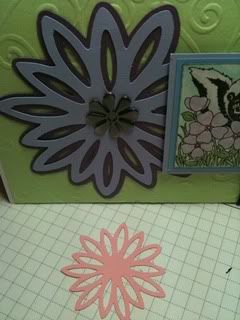
The big flower is exactly the same as the little ones that I've used on the other cards. This shows the difference in the size of the flowers. The pink one was included in the challenge kit. I imported that flower into SCAL to cut the big flower and the shadow on it. I really like that flower and plan to use it on many other things!

Photobucket


Up next: A birthday banner using SCAL, paper, and tulle. :)

Have an awesome Monday and a great, big, beautiful tomorrow.

~*Shell*~

Saturday, May 15, 2010

May Challenge #3

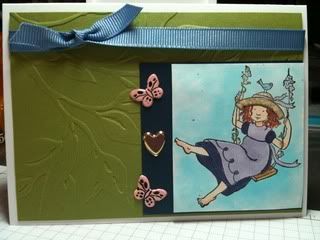
The embossed background on this card is from the May challenge kit. The tree branch embossing worked really well with the swing image. The image came from an SU set that I bought in the spring. I love it because I can use my Copics .... yet again. :)

Photobucket

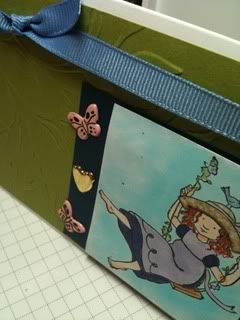
I had the ribbon on hand and collected the brads at some point in the past. :) I love the butterflies and the hearts. The layer behind the image is Night of Navy. All paper - to my knowledge - is SU.

Photobucket


I have one more challenge card done and will post that soon. I used SCAL on it and really like the way it turned out.

I hope all of you have a wonderful Saturday night and a great, big, beautiful tomorrow.

~*Shell*~

Thursday, May 13, 2010

May Challenge #2

How many cards can I get out of the May challenge kit?? Well, so far, I'm up to 4. I think I can get 2 more cards out of the things I have left. :) We'll see.

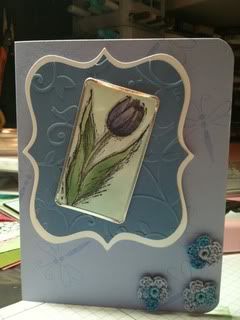
I thought the colors on this card turned out very pretty and that it would work well for my mom for Mother's Day - she's pretty darn special, ya know. :) :)

A wonderful friend on my Cricut thread over on SCS decided to clean out her crafting area. She decided, too, that she wanted to get rid of a few things. One of the tools that she chose to part with was the tag maker by MM. I told her that if she really, really didn't want it, I would love to try it out. Oh my. She sent the tool, as well as a TON of the rims that go with it. THANK YOU, DIANA!!! It gave me the freedom to make the tulip image into a metal-rimmed tag. I love the effect that it had.

Photobucket


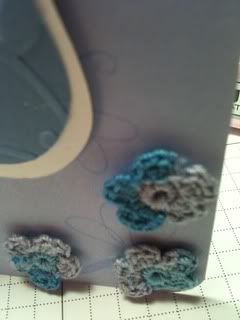
The flowers at the bottom of the card were made by yours truly and worked great with the paper colors I chose.

Photobucket


The paper is all SU, the image is colored Copics, and the blue and white background layers were cut using SCAL. The blue layer was embossed using the Cuttlebug. The dragonflies in the background are from a Clear Dollar Stamps set (All About Spring).

Photobucket


Another challenge card coming soon.

Hope you have a great Thursday evening and a great, big, beautiful tomorrow. :)


~*Shell*~
Tuesday, May 11, 2010

May Challenge

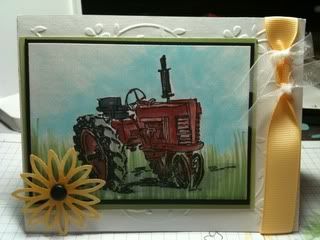
The May challenge package came last week. A couple of the images were perfect to use for Mother's Day. My mother-in-law loves tractor images, so this one worked very well for her card.

Photobucket


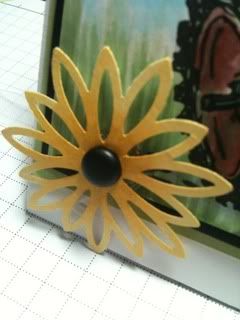
The embossed background, tractor image, and flower die cut were included in the challenge packet. The die-cut flower was actually white, but I used Copics to match it fairly closely to the ribbon color and added a brad to the center.

Photobucket


The tractor image, too, was colored with Copics. It was also placed on pop dots to add some dimension.

Photobucket


Both ribbons used are from SU.

Photobucket


My mother-in-law appeared to really like this card. I hope so. I really like the way it turned out.


I have taken a picture of one of the die-cut flowers so that I can import it into SCAL at some point. :) I like that flower. I think that will be tremendous fun to play with one day.


Have a wonderful Tuesday and a great, big, beautiful tomorrow!!!

~*Shell*~
Friday, May 07, 2010

Paper Drawers

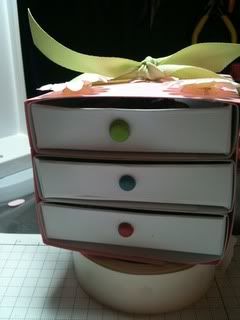
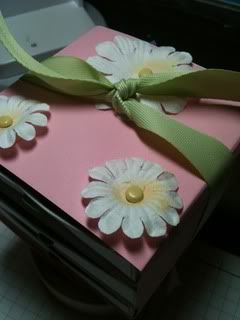
Last year, my very super, secret pal on SCS made me a precious set of paper drawers. She did an amazing job and I LOVE them. They sit on my shelf in my Haven where I can see them and use them. A couple of days ago, I found this tutorial on how to make a set. This set isn't exactly like the ones Amy made me, but I thought they'd be fun to try. I figured that I could make a template for the SCAL and not have to cut as much.

Mine didn't turn out quite as pretty and as well made as the others I've seen, but I can work on that, I suppose. :)

Photobucket


It was made using SU paper and GP white paper. The flowers are MM and were gotten at Michael's a few days ago. The ribbon is SU. I have no idea where the brads are from as I've had those for quite some time.

Photobucket

I want to try this project again when I get some time. I'm quite sure I can do a better job on it than this time. :)

Hopefully, my mom will like it, though. I'm giving it to her (filled with a few goodies) for Mother's Day. :) She's an amazing woman, and I love her so very much.


Have a wonderful Friday night, a great, big, beautiful tomorrow, and a very happy Mother's Day! Tell a mom that she's appreciated!!!


~*Shell*~
Wednesday, May 05, 2010

Mother's Day Project

It's a little late, I guess, for many of you, but this project is too good not to share.

Each Sunday, I teach 1 and 2 year olds. Each year is a challenge for me as I try to find a project to present to the mommies of these precious children on Mother's Day. This year, my brain had a .... vision. :) I thought that it would be very cool to create silhouette, keepsake pictures for the moms. Over the last few weeks, I've tried to capture pictures of each of the children in a profile position. That has NOT been easy! Those little heads never stop moving. :) And if you're looking at them with a camera, they either hide or look directly at you. It's very difficult to get them to look to the side - with a plain background. Whew. Did it, though.

The first one that I completed was actually not one of my Sunday school kids, but my precious daughter.

Photobucket


The white and pink papers are SU, the black is from WalMart, and the font is Pooh. The frame was bought at the Dollar Tree, so I paid big bucks for it .... not. :)

Hopefully, along with 5x7 frames with the children's hand prints, these silhouettes will be gifts that the moms will cherish for a long time.


Have a fantastic Wednesday and a great, big, beautiful tomorrow!!!


~*Shell*~

Monday, May 03, 2010

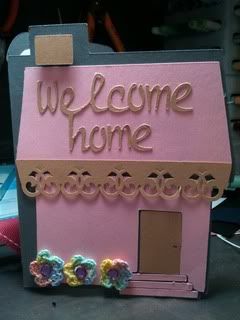
Happy New House

A friend of mine on SCS just moved in to a new house. I'm so excited for her, and I wanted to make a special card for the occasion.

A silhouette of a house was found online. After some clean up and contrasting, the image was worthy of being imported into SCAL. It should have been separated into the different components, but I really didn't think I needed that ... until I was finished. :) After importing, the image was shadowed to make it work as a card base. It was also welded to a rounded rectangle. A regular image was prepared to cut, as well, to be the layers on the front.

Photobucket


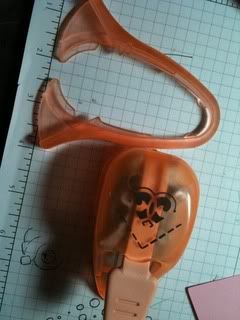
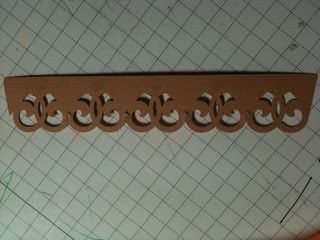
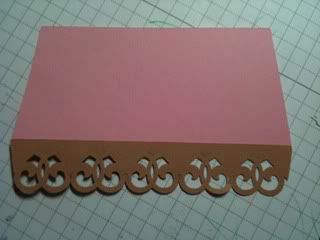
I wanted a cute 'Victorian' scallop on the roof, and I could have added that had I separated the components .... Oh well. I had to improvise. :) A corner punch sat in front of me. I took off the 'corner guard' and punched a scallop on a piece of cardstock the same length as the roof.

Photobucket


Finished scallop ...

Photobucket


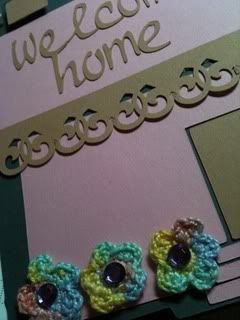
Adhered to the roof ...

Photobucket


Some handmade flowers were put on the front and "Welcome Home" was put on the roof.


Photobucket


I just hope my friend enjoys the card a fraction of the amount that she will enjoy her new house!! :)


Have a wonderful Monday night and a great, big, beautiful tomorrow!


~*Shell*~

Saturday, May 01, 2010

Graduation Congratulations

A very special friend of ours is graduating high school in a few weeks. Today was her graduation party, and I, of course, made her card.

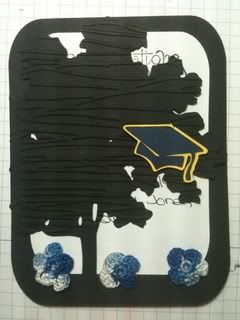
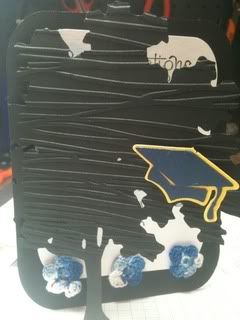
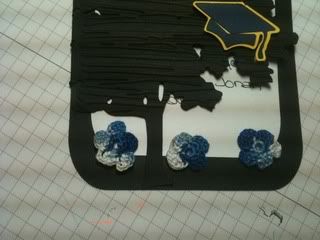
She has a 'thing' for trees, as they represent the Tree of Life for her. Much of her art has a tree representation in it somewhere (she's an awesome artist!!). A tree seemed the logical place to start for her card. I found one on the internet, converted it and imported it to SCAL, and welded it to a rounded rectangle to create the card base.

Photobucket


I added the graduation cap (cut in SCAL from the same file as the graduation cap card in a recent post) in her school colors, as well as the flowers to give the card dimension and texture. The cap was also placed on pop dots. White was used on the inside to allow room for a special message to her.

Photobucket


The paper is from SU, and the flowers were handmade by me.

Photobucket


I hope she finds the card as special as she is. :) Love ya, Victoria.

Have a wonderful Saturday and a great, big, beautiful tomorrow!!


~*Shell*~