Last night, I was a bit bored. I couldn't create because I was tired, so I tried cutting chipboard .... with my Cricut!!! It worked, and it did a great job. The chipboard was thin (like at the back of a memo pad or something), but it's going to be really cool to work with. I can use it to make more of the little books that I made for Father's Day or to make elements - of various sizes! - for cards and projects. So cool. I'm just thinking of all of the options with the *custom* chipboard pieces!! Now .... if I can just get time to create without my extra almost-2-year-old appendage. :)
I altered my blog - can ya tell?! LOL! I have been trying to get a good header for some time, and I finally figured it out today. I need to remake it to make it span the whole top part of the blog, and I need to fix my last post, but I'm liking it. Let me know what you think of the header. Now that I have it figured out, I will change the header more often.
Wednesday, June 20, 2007

Monday, June 18, 2007
Tutorial ...
I know that the tutorial for the little photo book isn't needed now, but I thought I would give it a shot anyway. Perhaps someone will benefit from it - or I will just learn how to do (or not do) one.

Supplies:
-chipboard squares (I cut mine with the Sizzix, and I believe they were 3 1/2 inch squares, but you can use any size
-5 pieces of paper to cover chipboard
-hole punch (I used a Japanese Book Drill)
-Mod Podge or strong adhesive
-ribbon of choice
-embellishments
*Step One - gather supplies. I didn't really get all of my embellishements together in the beginning because I work on the fly.

*Step Two - apply strong adhesive. I brushed on a thin layer of Mod Podge to ahere the paper to the chipboard squares. Put paper on squares and allow to dry if necessary.

*Step Three - punch holes. Using the top part of an SU! order form as a guide, I punched the holes. For the cover, two holes are punched on the left-hand side. For the other 'pages,' holes are punched on both the left and the right sides.

 *Step Four - mat the pictures and embellish the pages. For this one, I used some fun stickers to embellish.
 *Step Five - tie ribbon. Attach each 'page' to the other with ribbon. I made sure that the ribbons tied inward in all cases except for the first set that attaches the cover to the first 'page.'
You can see below how the ribbons are tied.

*Step 6 - fold and tie. Fold the book up accordian-style and tie with a ribbon until time to give as a gift or show off!!! I simply used a ribbon to wrap around the closed book and tied it.
:) Happy Stamping!

Supplies:
-chipboard squares (I cut mine with the Sizzix, and I believe they were 3 1/2 inch squares, but you can use any size
-5 pieces of paper to cover chipboard
-hole punch (I used a Japanese Book Drill)
-Mod Podge or strong adhesive
-ribbon of choice
-embellishments
*Step One - gather supplies. I didn't really get all of my embellishements together in the beginning because I work on the fly.

*Step Two - apply strong adhesive. I brushed on a thin layer of Mod Podge to ahere the paper to the chipboard squares. Put paper on squares and allow to dry if necessary.

*Step Three - punch holes. Using the top part of an SU! order form as a guide, I punched the holes. For the cover, two holes are punched on the left-hand side. For the other 'pages,' holes are punched on both the left and the right sides.

 *Step Four - mat the pictures and embellish the pages. For this one, I used some fun stickers to embellish.
 *Step Five - tie ribbon. Attach each 'page' to the other with ribbon. I made sure that the ribbons tied inward in all cases except for the first set that attaches the cover to the first 'page.'
You can see below how the ribbons are tied.

*Step 6 - fold and tie. Fold the book up accordian-style and tie with a ribbon until time to give as a gift or show off!!! I simply used a ribbon to wrap around the closed book and tied it.
:) Happy Stamping!
Tuesday, June 12, 2007
Wanna See????
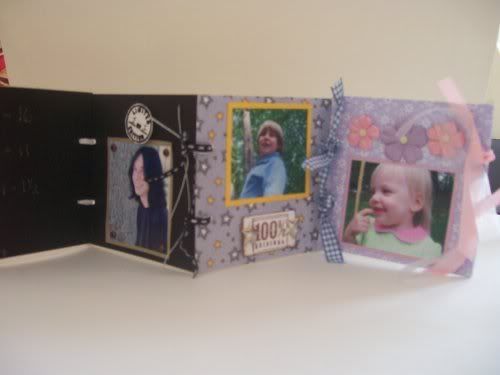
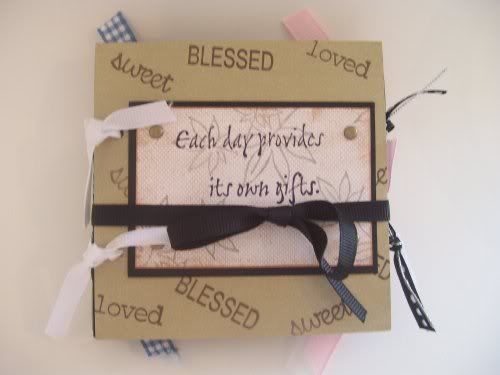
Ok ... so I had an idea about what to do for Mark's Father's Day gift. I wanted to do something with stuff that I have here, and I wanted it to be something that he could put on his desk at work with the kids' pictures in them. I didn't want to use the Cricut to cut the chipboard that I have (not brave enough to try that yet...), so I had to work with the size that I had for the Sizzix. It worked out well, though. The pictures are little, but good for his desk.
Here it is open.
And here it is closed.
I'm really pretty pleased with how it turned out. I sure hope that Mark likes it. I may not be the best, but he will like it because I made it. He's so good about that. At least, I had everything here without having to buy anything. He'll really like that part!!! LOL!!
Jared is at camp this week, and they are having VBS at church.
OH!! I made one of those "Infinity Boards" to take pictures of my creations. I got the idea from Keri - http://pinklemonade.typepad.com/ . It works great!! I may have to get a big piece of poster board, but for the one I did today, I just used a small one. I'm thrilled with the way the pictures took.
Ok ... gotta go bathe the bug and get ready for VBS. I hope you guys have a great day!!
Here it is open.
And here it is closed.
I'm really pretty pleased with how it turned out. I sure hope that Mark likes it. I may not be the best, but he will like it because I made it. He's so good about that. At least, I had everything here without having to buy anything. He'll really like that part!!! LOL!!
Jared is at camp this week, and they are having VBS at church.
OH!! I made one of those "Infinity Boards" to take pictures of my creations. I got the idea from Keri - http://pinklemonade.typepad.com/ . It works great!! I may have to get a big piece of poster board, but for the one I did today, I just used a small one. I'm thrilled with the way the pictures took.
Ok ... gotta go bathe the bug and get ready for VBS. I hope you guys have a great day!!
Monday, June 04, 2007
Altered Box!!
I've wanted to try one, but really couldn't figure it out. I sat down and did it today.
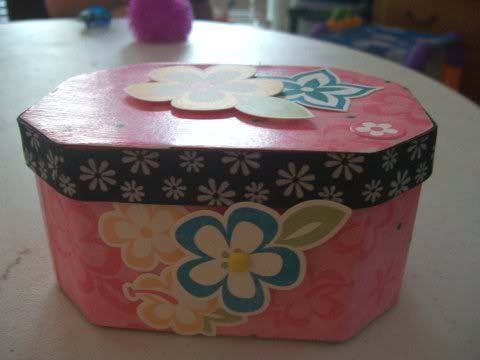
I'm fairly pleased with it. What do you think?? It's for a friend that takes the boys to math on Tuesdays. The last class is tomorrow, so I thought I would make a thank you.
Here's a card I made with my Cricut the other day for a friend's birthday....
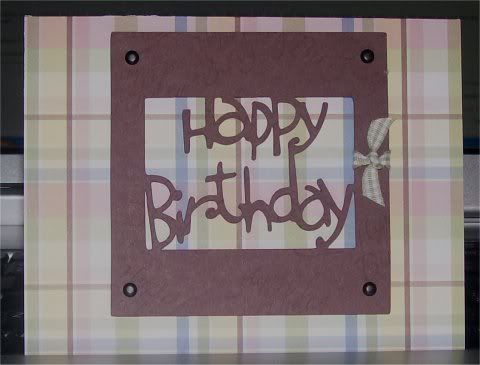
I really liked this. I used my favorite cartridge .... Zooballoo!!!!!!!! Love that thing. It's so versatile.
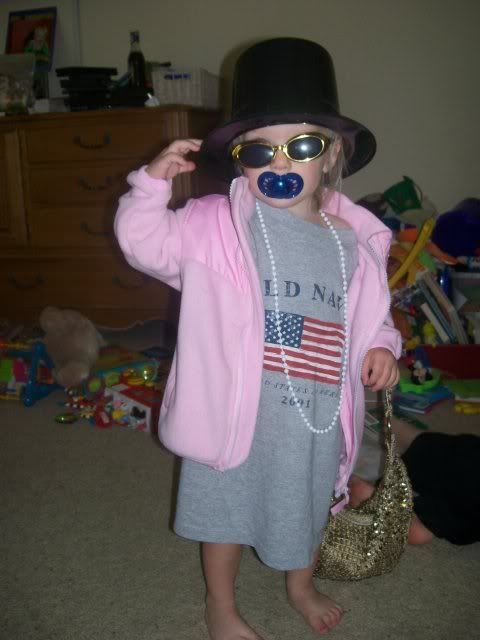
Oh ... and here's my little bug .... What a character .....
I'm fairly pleased with it. What do you think?? It's for a friend that takes the boys to math on Tuesdays. The last class is tomorrow, so I thought I would make a thank you.
Here's a card I made with my Cricut the other day for a friend's birthday....
I really liked this. I used my favorite cartridge .... Zooballoo!!!!!!!! Love that thing. It's so versatile.
Oh ... and here's my little bug .... What a character .....
Tuesday, March 27, 2007

March 24th .... The Georgia SCS gathering!!! We had a great time and made/took about 22 swaps. It was great, great fun. This is a popcorn box that I made as my project for the swap. I didn't include the glitter just becuase that would have made suuuuuuch a mess!
There were really some great projects there and even greater people. I love seeing everyone, again.
Jaydin has learned to climb - everything. I thought this was a great picture of my little monkey.
 Her hair is getting long, and she's got such a great, happy smile.
Subscribe to:
Posts (Atom)




 Posts
Posts