Because I'm late, I'm going to show a Valentine's Day ornament/card instead of one for Christmas, but you make yours just any way you'd like. :)
Supplies - light weight paper for webbed part (light weight, designer paper is good for this) heavier paper for the base (good and heavy to help hold the ornament open when it is hung). paper for the small ornament piece inside the webbed part (any type of paper is good for this), adhesive (I used ATG), embellishments, string or cord (I used SU's silver cording)
For my project I used - Real Red SU paper (NOT recommended for the webbed piece, but I needed something a little sturdier to work with while doing the tutorial) and Whisper White SU paper
To begin the ornament, comment on JenC's blog and ask her for it. When you create an ornament and put it on your blog or in your gallery, give her the credit for creating the file. :)
Open the .cut file in the Cricut Design Studio. I changed the file *just a tad* to add a smaller circle to add to the back of the base of my ornaments and put it on the same mat as the other pieces. This allows me to add a contrasting, lighter color to the back so that I
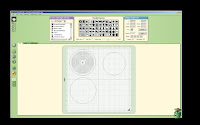 can write a note on the bottom for the person or people to whom I send it. I am also able to cut all 3 pieces (regardless of color) at the same time.
Here's a picture of the file with my extra circle added.
 Put the paper on the mat. I put 2 colors on the mat at the same time. The webbed part and the base to match it will be red. The extra, smaller circle will be white to contrast with the red and to give me a white area on the bottom of the ornament to write a note to the recipient.
Put the Plantin' Schoolbook cart in your Cricut, and load the mat.
Press "cut" in your Design Studio software. Make sure your Cricut is connected to your computer.
When the program has completed the cutting, unload the mat, and take off the outer parts of the paper - not the actual ornament pieces.
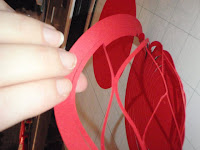
It's time to remove the ornament pieces, BUT .... *be careful* with the webbed circle. It is very delicate and will tear easily as it comes off of the sticky mat. You must be uber gentle with this step.
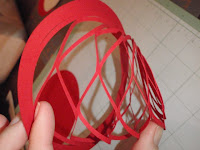 After the ornament pieces are off of the mat, you may want to stretch your webbed piece a bit to get it into shape. Again, be gentle. This time, though, you don't have to be quite as careful. It is, after all, made to stretch.
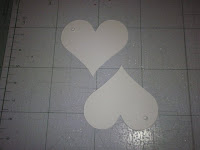 Because I'm making a Valentine's ornament, I used red, white, and pink as my colors. Little white hearts (also from Plantin' Schoolbook) were cut using the Cricut and are used as my little inner, hanging ornaments. Make sure that you have a hole in your little pieces, or you will need to cut one so that it can hang inside your ornament.
 Next, adhere your contrasting circle (if you have one!) to the bottom of the big circle. Typically, I use another color, but white worked well with the Valentine's theme this time.
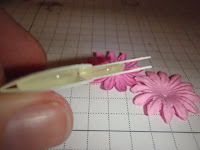 Because I want my hearts to be heavy enough to hang well inside the ornament, I doubled them, adhered them back to back with dimensional glue dots, and to the edge of the hearts, added the Primas with a cute, heart brad (MM??? Maybe? I don't know where I got those.) in the center.
 Slip the string, cord, or ribbon through the hole(s) on your inner ornaments (my hearts!), and pull both ends through the hole in the webbed part of the ornament so that when you hold it up, you can make tie a knot to make the string into a loop to hold the ornament on the tree or place it will be hung. Decide how much of the string needs to hand down inside the ornament. Hold the string there to mark the place. Pull it from the ornament, and tie a knot there. That will prevent the inner ornaments from hanging right at the top of the webbed part when the completed ornament is fully open.
 Then, slip the strings back through the hole in the top of webbed portion and tie a knot (bigger than the hole!) in the string making a loop out of the whole thing. As you can see in this picture, you want a little bit of the string hanging down on the inside. That's why we tied the knot in the last step.
 Put adhesive around the edge of your base, being careful not to get it in the center or where the pieces of the web will stick to it.
 Adhere the pieces together to complete the ornament. Make sure you get the base and the bottom of the web lined up as closely as possible.
Embellish your ornament as you wish, but keep the base heavier than the webbing to ensure that it opens when it hangs.
Now, take a picture and share it on your blog, in your gallery, on your MySpace, or somewhere!!! Everyone needs to see these beautiful creations. And, don't forget to tell JenC thanks for all the hard work she did on the .cut file!! :)
Write a note on the back to a friend, flatten the ornament, put it in an envelope and send some joy to a special person in your life!! :)
I'm sorry that I didn't get this up sooner, but with the holidays and reorganizing the Haven, it just got lost in the shuffle. If you have questions, PLEASE contact me!!! I would love to have a chance to help you. Please, however, DO NOT ask me for the .cut file. That is the property and design of Jen, and if you want it, you need to go to her personally! :)
As always, let me know what you think!
Tomorrow, I should have pictures of my new stamp shelves (for individual stamp storage) in my Haven. I've not seen them yet. Hubby is surprising me with them!! :) I can't wait to see them!!!!
Stamp happy, and have a great, big, beautiful tomorrow!!!


Hi Shell,
ReplyDeletethanks for letting me know! Yor Valentines ornament turned out really cute! :o)
Don't ya just love how easy the cricut makes all these intricut cuts ??!! I know I do.
Hugs!